![[ Substance 3D Designer 入門 ] Substance 3D Painter に出力するまでの基本的な手順について](https://www.plamophy.com/wp-content/uploads/substance3ddesigner-ec-camouflage-01.jpg)
![[ Substance 3D Painter ] レンダリングの設定項目](https://www.plamophy.com/wp-content/uploads/substance3dpainter-ec-rendering-01.jpg)
![[ Substance 3D Painter ] ペイントブラシの設定方法](https://www.plamophy.com/wp-content/uploads/substance3dpainter-ec-painting-brush-setting-01.jpg)
![[ Unreal Engine 5.3.1 ] Procedural Content Generation (PCG) の使用方法について](https://www.plamophy.com/wp-content/uploads/unrealengine-ec-pcg-01.png)
![[ Substance 3D Painter ] 半透明マテリアルのシェーダー設定方法](https://www.plamophy.com/wp-content/uploads/substance3dpainter-ec-shader-settings-alpha-blending-01.png)
![[ Substance 3D Painter ] シンメトリーを使用したペイント方法](https://www.plamophy.com/wp-content/uploads/substance3dpainter-ec-painting-brush-symmetry-01.jpg)
![[ Zbrush ] データの保存とロード方法について](https://www.plamophy.com/wp-content/uploads/ZBrush_data_storage_format_01.jpg)
![[ Zbrush ] UIをカスタムする方法について](https://www.plamophy.com/wp-content/uploads/ZBrush_ui-customization_01.jpg)
本記事では、UIをカスタムする方法について解説していきます。
また、ZBrushがバージョンした場合も、カスタムした UI の戻し方について確認していきます。
UIをカスタムする方法について
UI のカスタム方法
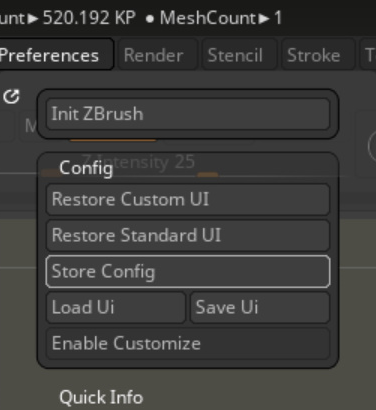
- [ Preferences ] パレットの [ Config ] から [ Enable Customize ] を ON の状態にします。
- Ctrl + Alt を押しながらドラッグして、シェルフに登録します。
![]()
カスタムしたUIを解除する方法は、
Ctrl + Alt を押しながらドラッグして、キャンバスにドラッグします。 - [ Preferences ] パレットの [ Config ] から [ Enable Customize ] を OFF の状態に戻します。
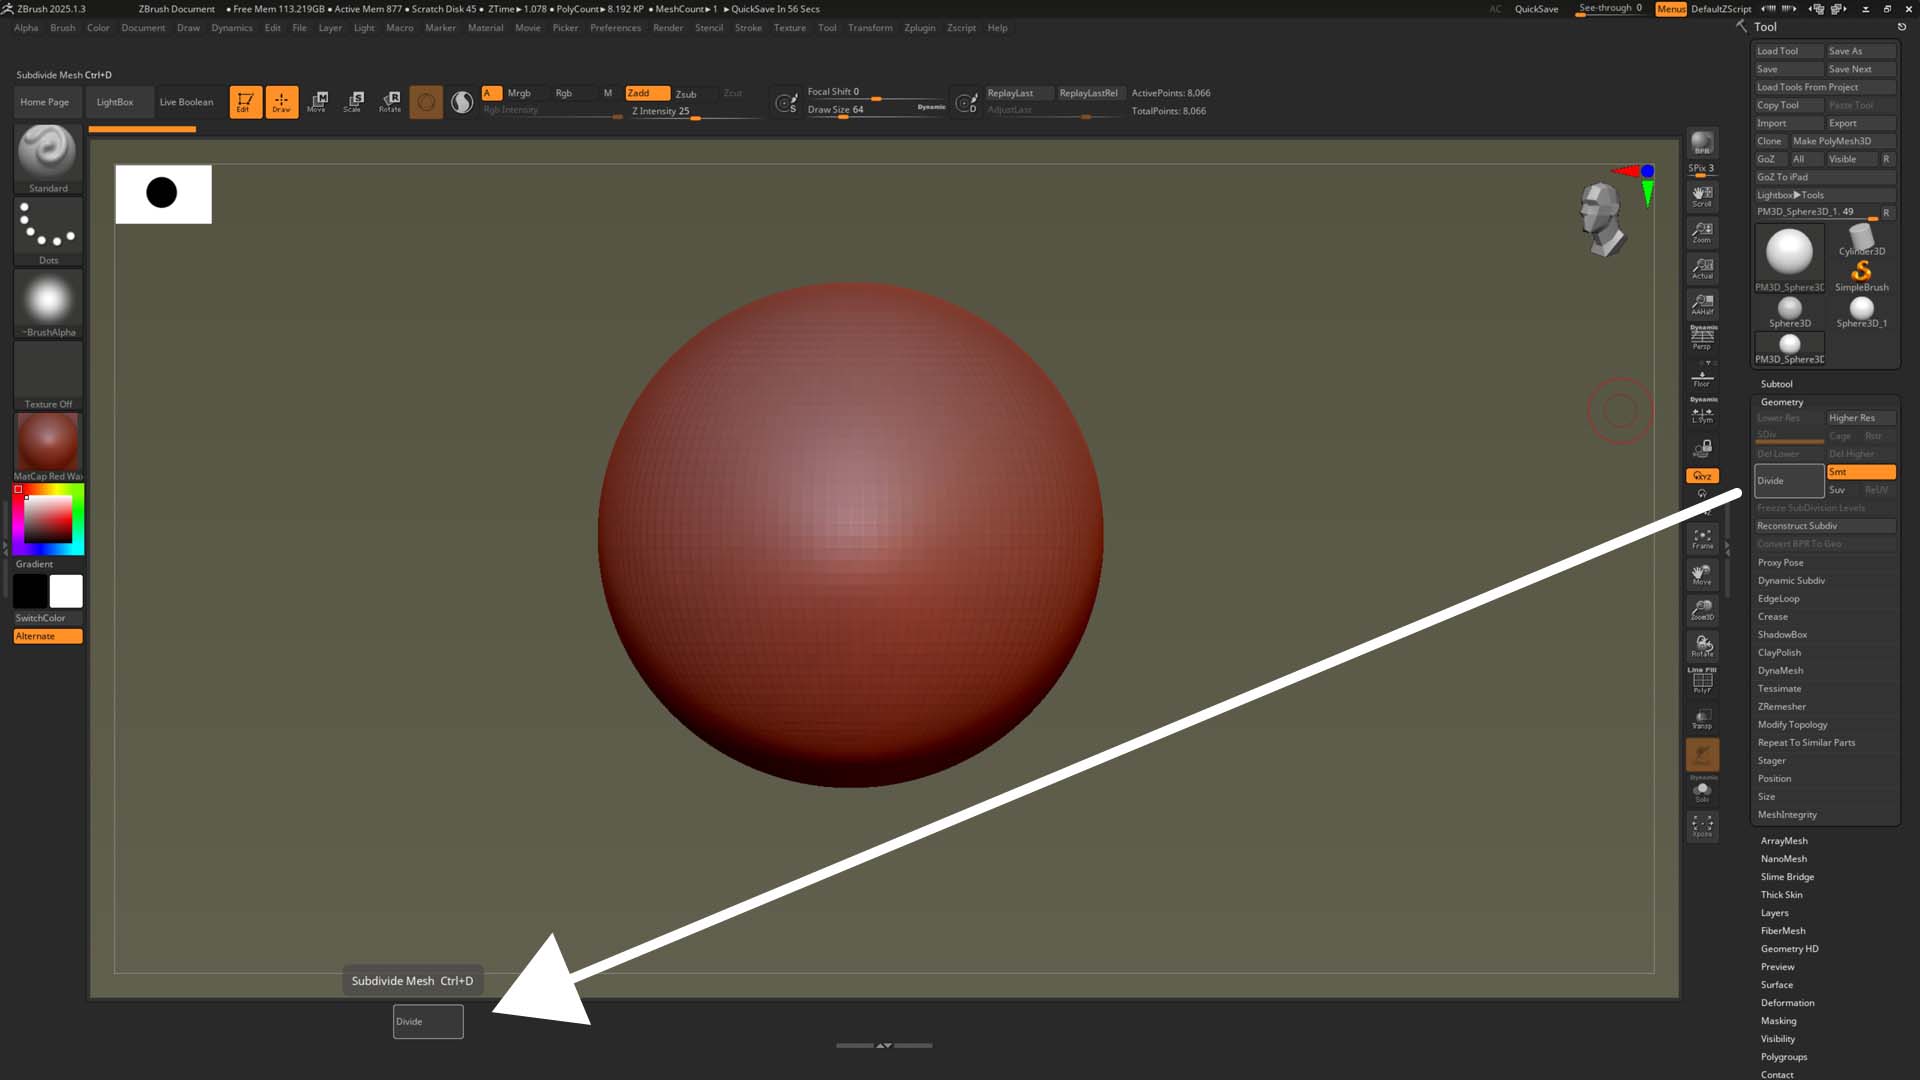
- [ Preferences ] パレットの [ Config ] から[ Store Config ] ボタンをクリックして、設定を保存します。
設定を保存することで、次回 ZBrushを起動時に反映されます。![]()
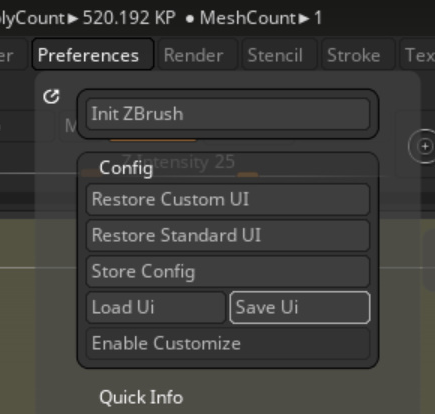
- 最後に、カスタムしたUIを保存します。
[ Preferences ] パレットの [ Config ] から[ Save Ui ] ボタンをクリックして保存します。![]()
UI 知っていると便利‼
ZBrushはバージョンアップするとUI が初期の状態に戻ります。
そのため、カスタムしたUIを保存することで、前バージョンで保存した UI にすぐに復帰することが出来ます。
UIを最初の状態に戻す方法
- [ Preferences ] パレットの [ Config ] から[ Restore Standard UI ] ボタンをクリックします。
また、UIをカスタムした状態に戻す方法は、
[ Preferences ] パレットの [ Config ] から[ Restore Custom UI ] ボタンをクリックします。
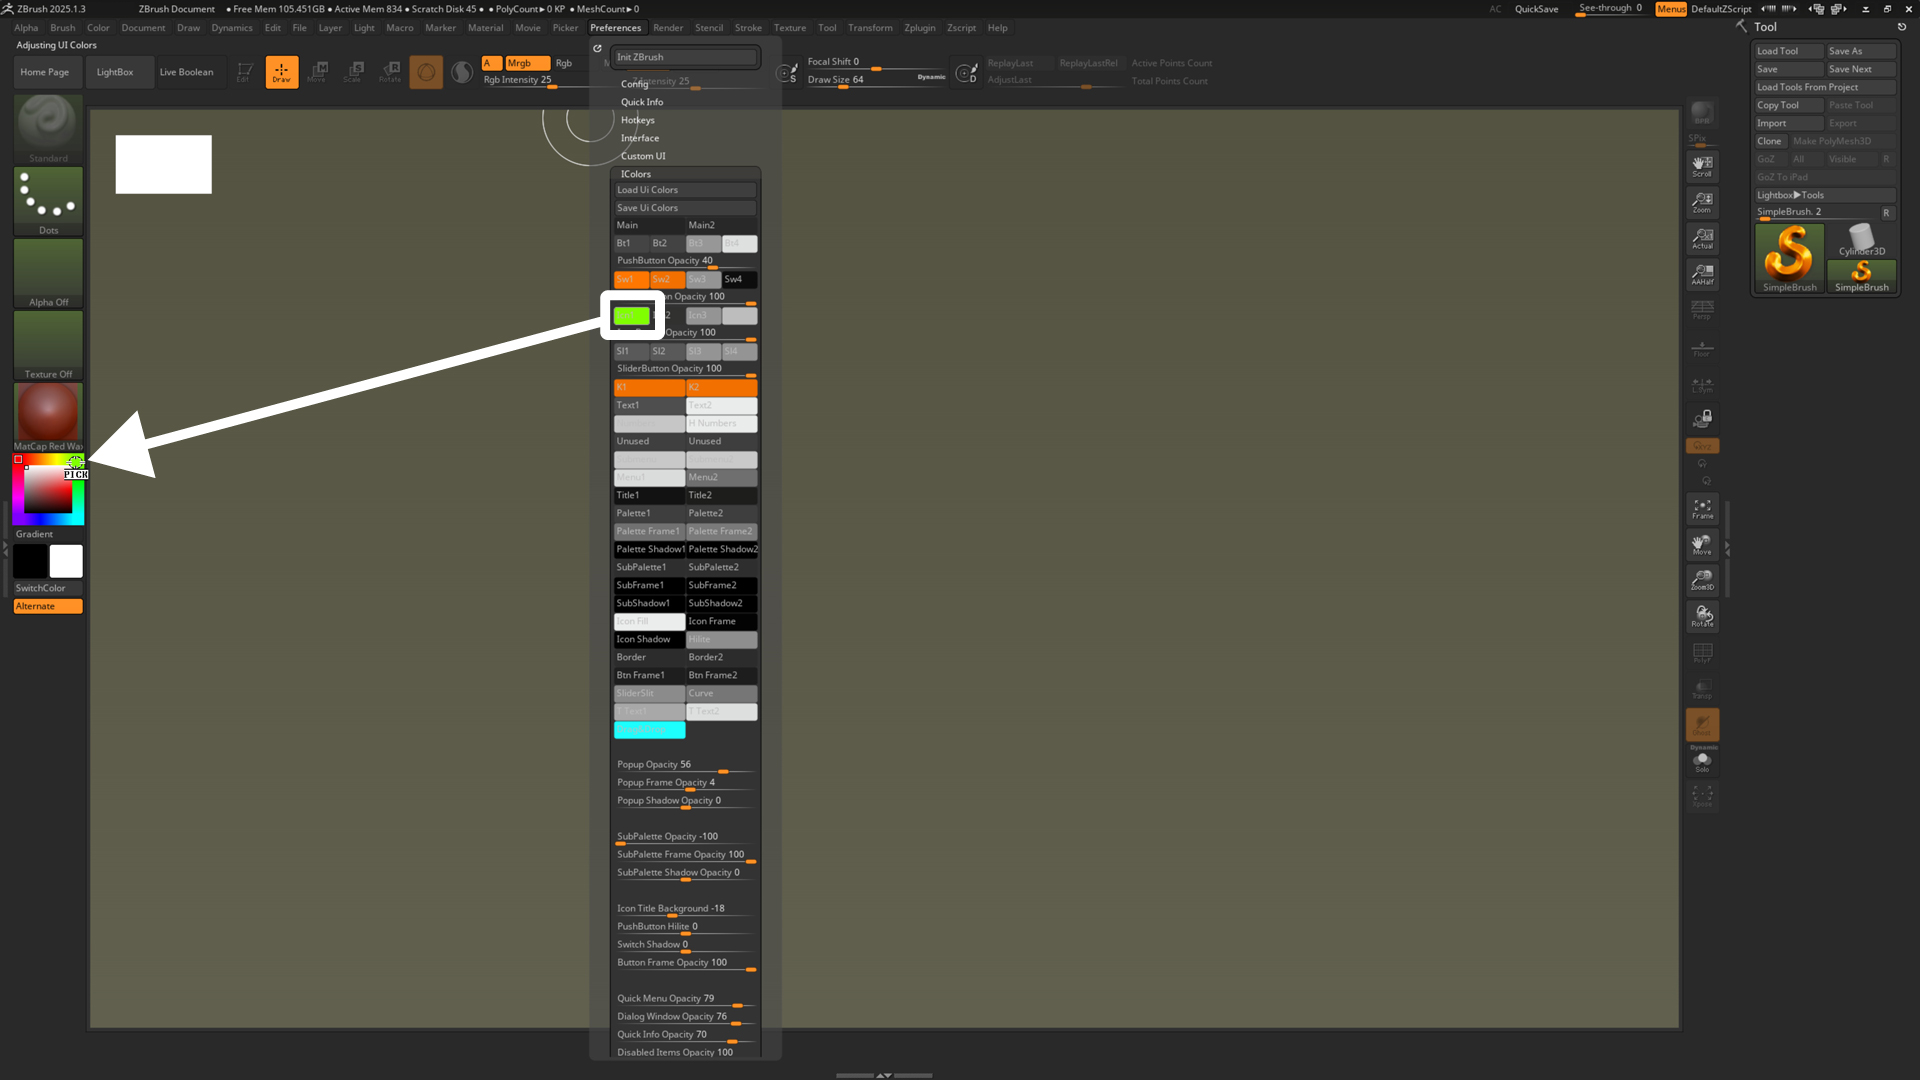
UI に色を付けて見やすくカスタムする方法
- [ Preferences ] パレットの [ IColors ] から、例えば [ Icn1 ] ボタンをクリックしたまま、カラーピッカーから色を選択します。
![]()
- UI のカスタマイズが終わりましたら、[ Preferences ] パレットの [ Config ] から[ Store Config ] ボタンをクリックして、設定を保存します。
ZBrush では、設定を保存することで、次回起動時に同じ設定で起動できるようになります。
ZBrushバージョン後に、カスタムした UI への戻し方
ポイント‼
ZBrushをバージョンアップするまえに、
上記で説明したように [ Preferences ] パレットの [ Config ] から[ Save Ui ] ボタンをクリックして保存しておきます。
保存しておくことで、カスタムした状態に戻すことができます。
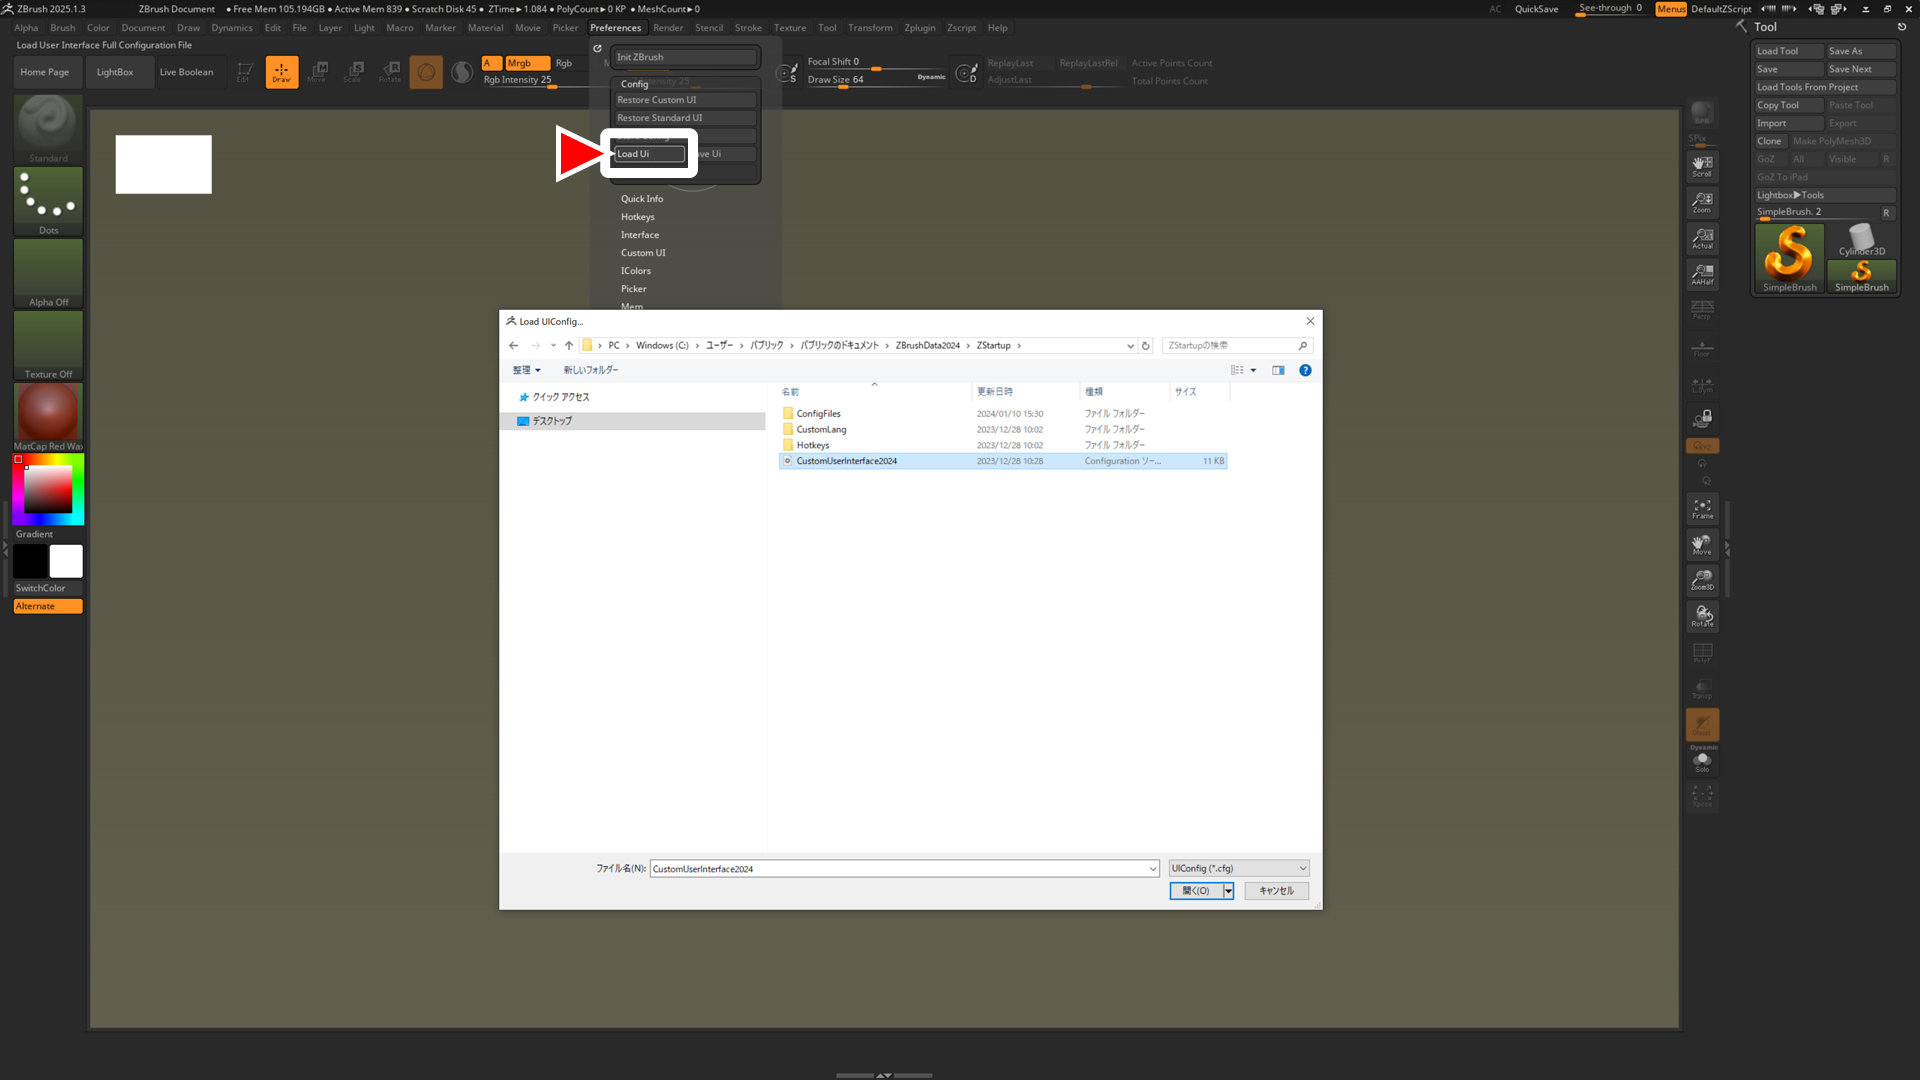
- [ Preferences ] パレットの [ Config ] から[Load Ui ] ボタンをクリックします。
![]()
- 例えば、ZBrush 2024 で保存した内容をロードしたい場合は、
C:\Users\Public\Documents\ZBrushData2024\ZStartup
に保存されている、CustomUserInterface2024 (.cfg) をロードします。
![[ Zbrush ] 起動時に LihgtBox を非表示にする設定方法](https://www.plamophy.com/wp-content/uploads/ZBrush_lightbbox_01-300x169.jpg)
![[ Zbrush ] データの保存とロード方法について](https://www.plamophy.com/wp-content/uploads/ZBrush_data_storage_format_01-300x169.jpg)
![[ Youtube ] おすすめの一覧です](https://www.plamophy.com/wp-content/uploads/youtube-recommended-list.jpg)
![[ Substance 3D Painter ] Hard Surface 素材を使用してノーマルにペイントする方法](https://www.plamophy.com/wp-content/uploads/substance3dpainter-ec-painting-brush-normal-01.jpg)

![[ Substance 3D Painter ] インポートしたテクスチャの設定方法](https://www.plamophy.com/wp-content/uploads/substance3dpainter-ec-painting-filllayer-texture-01-150x150.jpg)
![[ Substance 3D Painter ] テクスチャエクスポートの設定方法](https://www.plamophy.com/wp-content/uploads/substance3dpainter-ec-export-textures-01-150x150.jpg)
![[ Zbrush ] データの保存とロード方法について](https://www.plamophy.com/wp-content/uploads/ZBrush_data_storage_format_01-150x150.jpg)
![[ Substance 3D Painter ] ポリゴン塗りつぶしツールを使用したマスキング方法](https://www.plamophy.com/wp-content/uploads/substance3dpainter-ec-masking-polygon-fill-01-150x150.jpg)
![[ Substance 3D Painter ] マテリアル、テクスチャのインポート方法](https://www.plamophy.com/wp-content/uploads/substance3dpainter-ec-resource-import-01-300x125.jpg)
![[ Substance 3D Painter ] ベイクの手順と共通設定](https://www.plamophy.com/wp-content/uploads/substance3dpainter-ec-baking-mode-01-300x125.png)
![[ Substance 3D Painter ] テクスチャエクスポートの設定方法](https://www.plamophy.com/wp-content/uploads/substance3dpainter-ec-export-textures-01-300x125.jpg)
![[ Substance 3D Painter ] 半透明マテリアルのシェーダー設定方法](https://www.plamophy.com/wp-content/uploads/substance3dpainter-ec-shader-settings-alpha-blending-01-300x125.png)
![[ Substance 3D Painter ] ペイントブラシの設定方法](https://www.plamophy.com/wp-content/uploads/substance3dpainter-ec-painting-brush-setting-01-300x125.jpg)
![[ Substance 3D Painter ] シンメトリーを使用したペイント方法](https://www.plamophy.com/wp-content/uploads/substance3dpainter-ec-painting-brush-symmetry-01-300x125.jpg)
![[ Substance 3D Painter ] ポリゴン塗りつぶしツールを使用したマスキング方法](https://www.plamophy.com/wp-content/uploads/substance3dpainter-ec-masking-polygon-fill-01-300x125.jpg)
![[ Substance 3D Painter ] 色相の変更とグラデーションの作成方法](https://www.plamophy.com/wp-content/uploads/substance3dpainter-ec-painting-color-variations-01-300x125.jpg)
![[ Substance 3D Painter ] 環境マップの設定と明るさの調整方法](https://www.plamophy.com/wp-content/uploads/substance3dpainter-ec-display-settings-01-300x125.jpg)
![[ Substance 3D Painter ] レンダリングの設定項目](https://www.plamophy.com/wp-content/uploads/substance3dpainter-ec-rendering-01-300x125.jpg)
![[ Zbrush ] UIをカスタムする方法について](https://www.plamophy.com/wp-content/uploads/ZBrush_ui-customization_01-300x169.jpg)
![[ Zbrush ] スカルプトするまでの手順](https://www.plamophy.com/wp-content/uploads/ZBrush_3d-edit-mode_03-300x169.jpg)
![[ Zbrush ] ドキュメントサイズの設定方法](https://www.plamophy.com/wp-content/uploads/ZBrush_document-size_10-300x169.jpg)