![[ Substance 3D Painter ] 半透明マテリアルのシェーダー設定方法](https://www.plamophy.com/wp-content/uploads/substance3dpainter-ec-shader-settings-alpha-blending-01.png)
![[ Substance 3D Painter ] Hard Surface 素材を使用してノーマルにペイントする方法](https://www.plamophy.com/wp-content/uploads/substance3dpainter-ec-painting-brush-normal-01.jpg)
![[ Zbrush ] データの保存とロード方法について](https://www.plamophy.com/wp-content/uploads/ZBrush_data_storage_format_01.jpg)
![[ Zbrush ] UIをカスタムする方法について](https://www.plamophy.com/wp-content/uploads/ZBrush_ui-customization_01.jpg)
![[ Substance 3D Painter ] シンメトリーを使用したペイント方法](https://www.plamophy.com/wp-content/uploads/substance3dpainter-ec-painting-brush-symmetry-01.jpg)

![[ Substance 3D Designer 入門 ] Substance 3D Painter に出力するまでの基本的な手順について](https://www.plamophy.com/wp-content/uploads/substance3ddesigner-ec-camouflage-01.jpg)
![[ Youtube ] おすすめの一覧です](https://www.plamophy.com/wp-content/uploads/youtube-recommended-list.jpg)
![[ Zbrush ] スカルプトするまでの手順](https://www.plamophy.com/wp-content/uploads/ZBrush_3d-edit-mode_03.jpg)
本記事では、スカルプトするまでの手順についての説明となります。
スカルプトを始めるには、3D オブジェクト ” PolyMesh3D ” を用意する必要があります。
また、スカルプトするモードのことを ” 3D エディットモード ” といいます。
以下の手順でスカルプトするまでの流れを確認していきます。
・[ LightBox ] の [ Project ] からサンプルデータを読み込んで始める方法の確認
・[ Tool ] パレットから PolyMesh3D を用意する方法を確認します。
・obj、fbx などインポートする方法につて確認していきます。
まず始めに、[ LightBox ] の [ Project ] からサンプルデータを使用した方法を確認します。
ポイント‼
PolyMesh 3D を用意することで、始めてスカルプト(モデリング)することが出来るようになります。
スカルプトするまでの手順について
[ LightBox ] の [ Project ] からサンプルデータを読み込んで始める方法
[ LightBox ] の [ Project ] からサンプルデータをダブルクリックして読み込みます。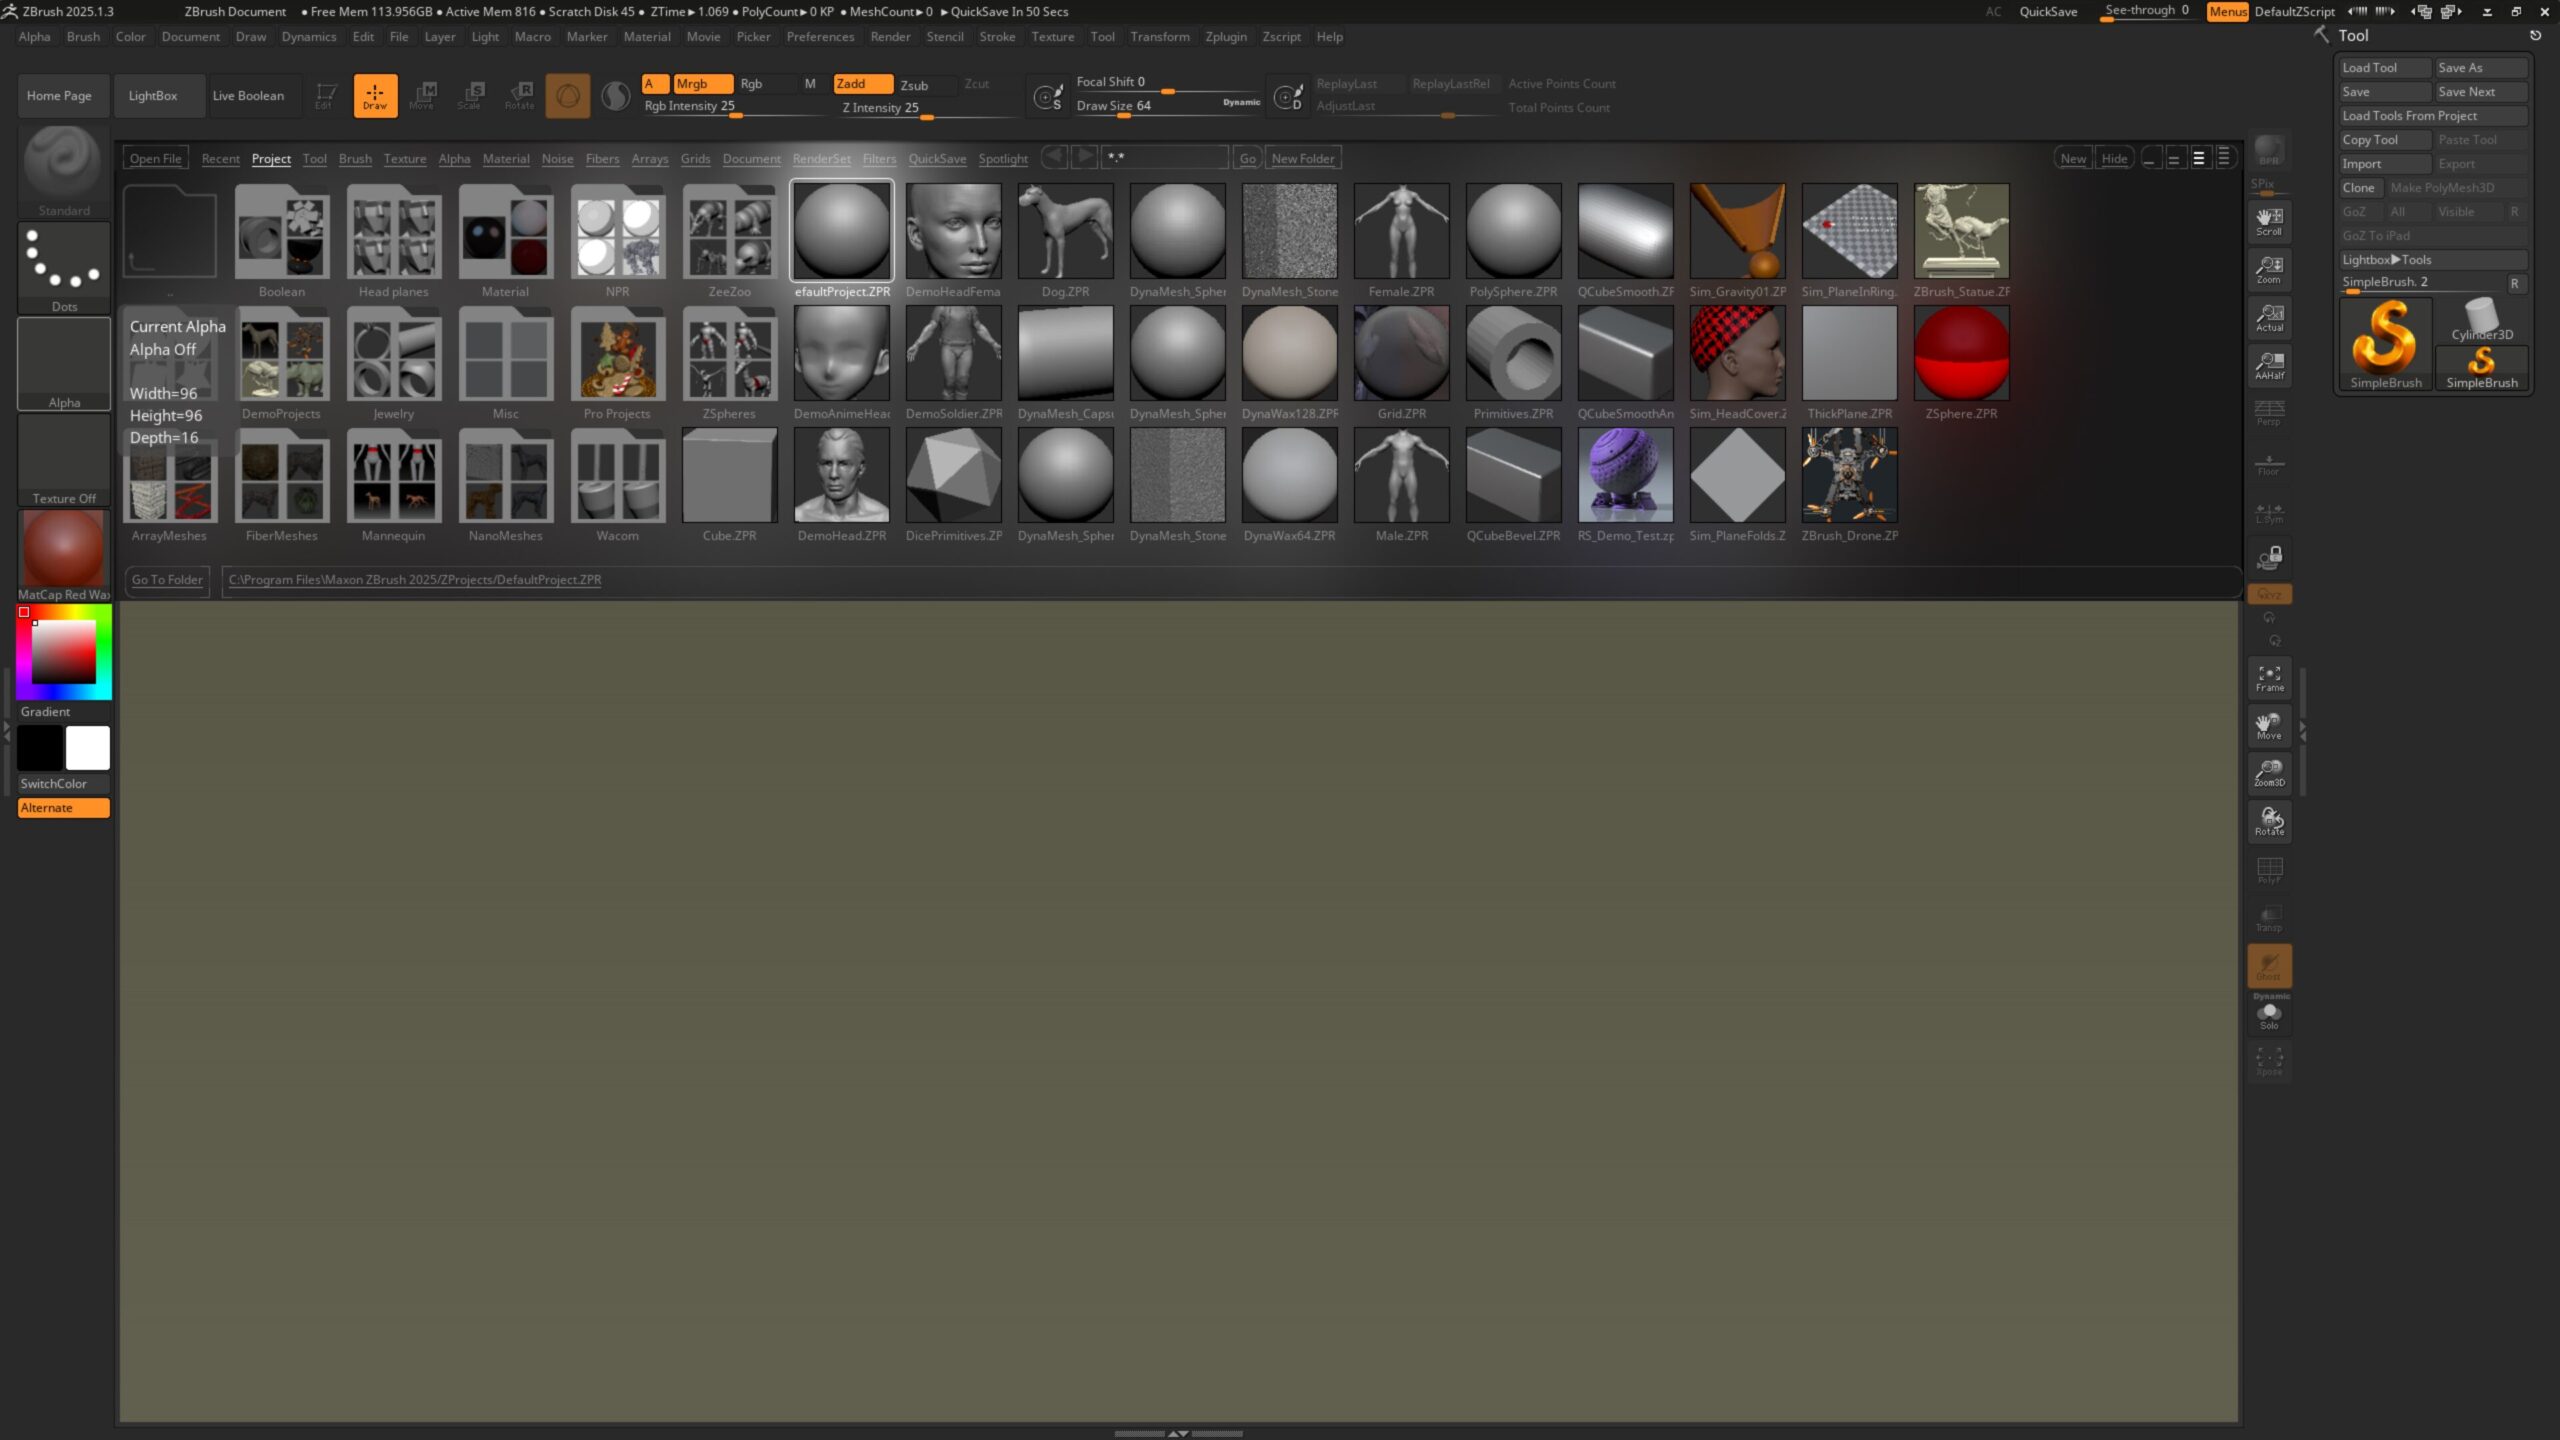
サンプルデータを読み込むと PolyMesh3D が読み込まれて、 [ Edit ] ボタンが ON の状態になります。
自動に2.5D エディットモードから 3D エディットモード に切り替わり、スカルプトする用意ができます。
Project から読み込んだ時の注意点
この Project からサンプルデータを読み込んだ場合は、
シーンの情報としてドキュメントサイズ、背景色も同時に読み込まれます。
自分の設定した背景色を変更したくない場合が多いと思いますので、
次の説明で、その手順を確認したいと思います!
[ Tool ] パレットから PolyMesh3D を用意する方法
- [ Tool ] パレット の [ Tool ] ボタンをクリックして、[ 3D Meshes ] から編集したい形状を選択します。
![]()
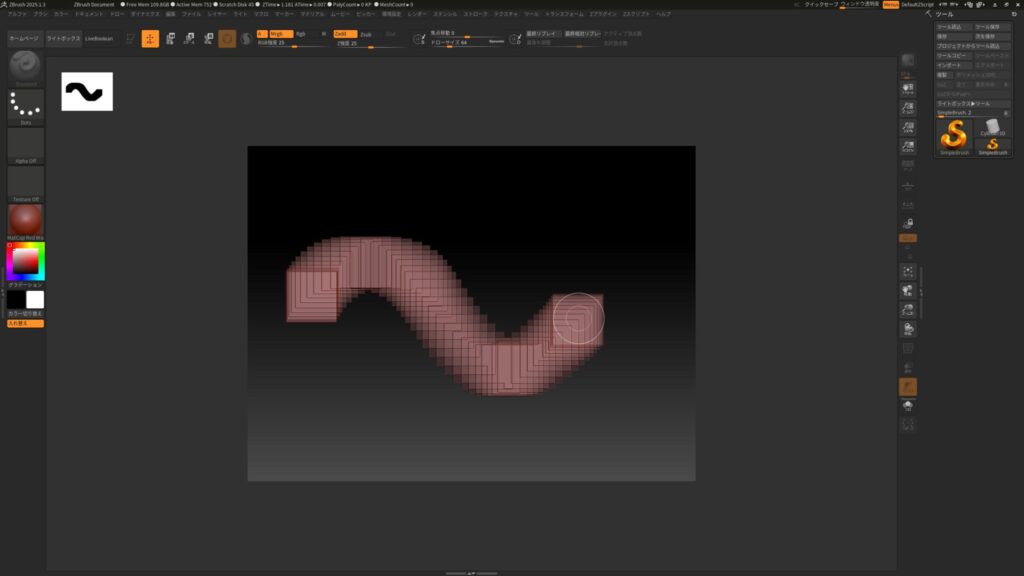
- キャンバスに描画します。
たくさん描画してしまった時は、Ctrl + [ N ] キーで消去して、やり直します。![]()
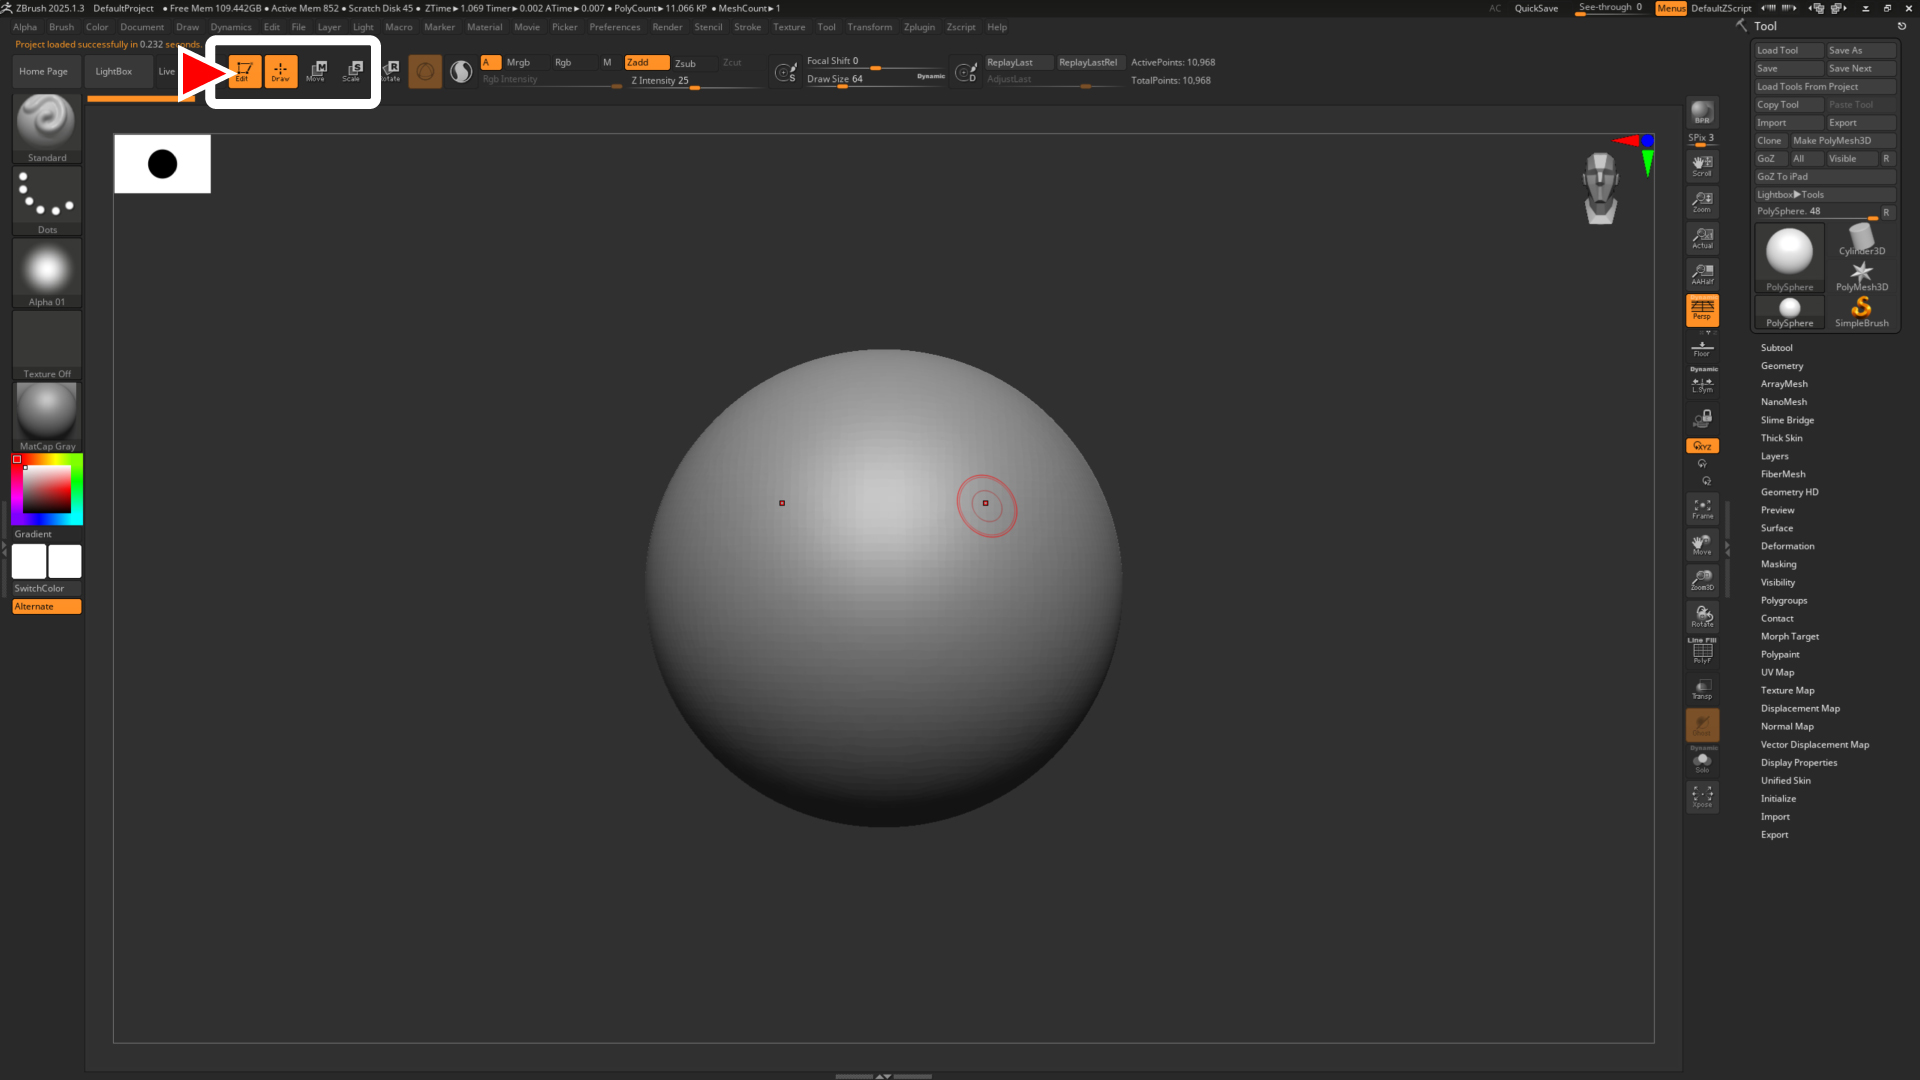
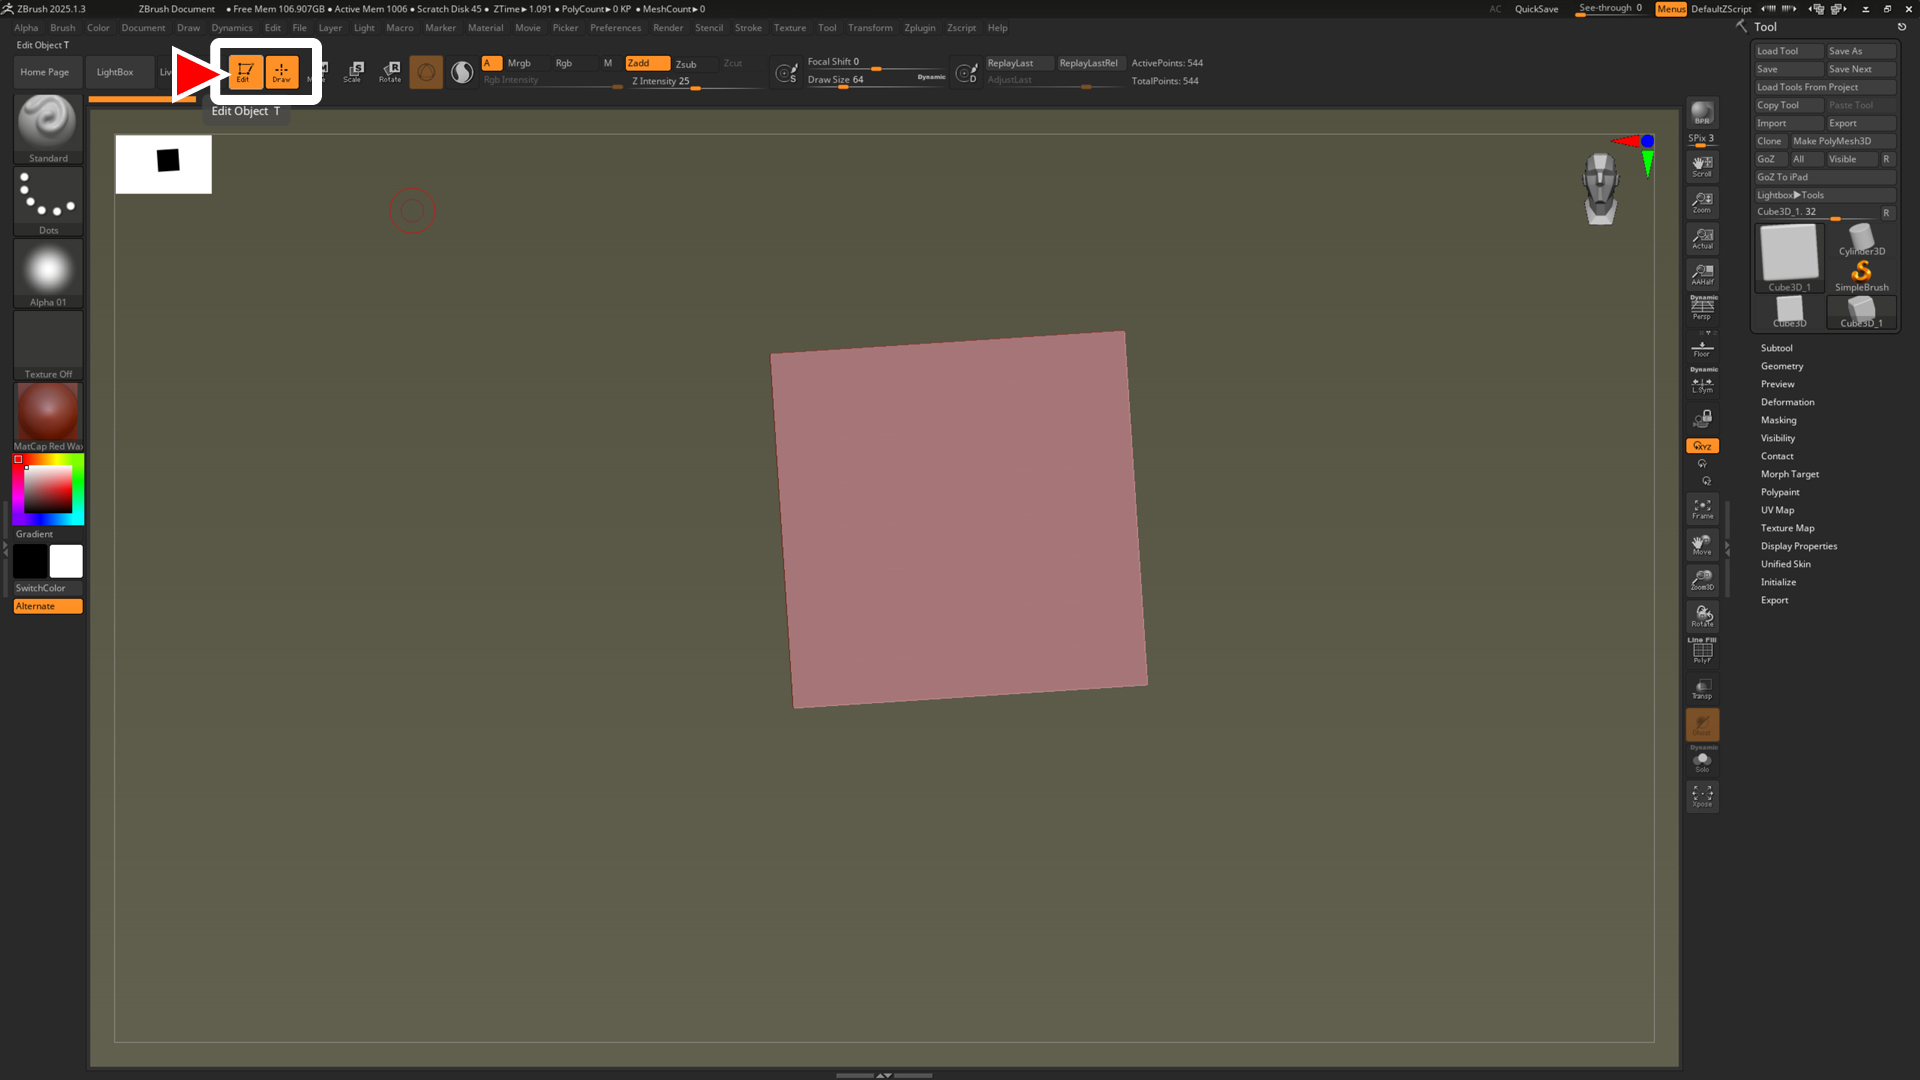
- [ Edit ] ボタンを ON にして、3D エディットモード に切り替えます。
![]()
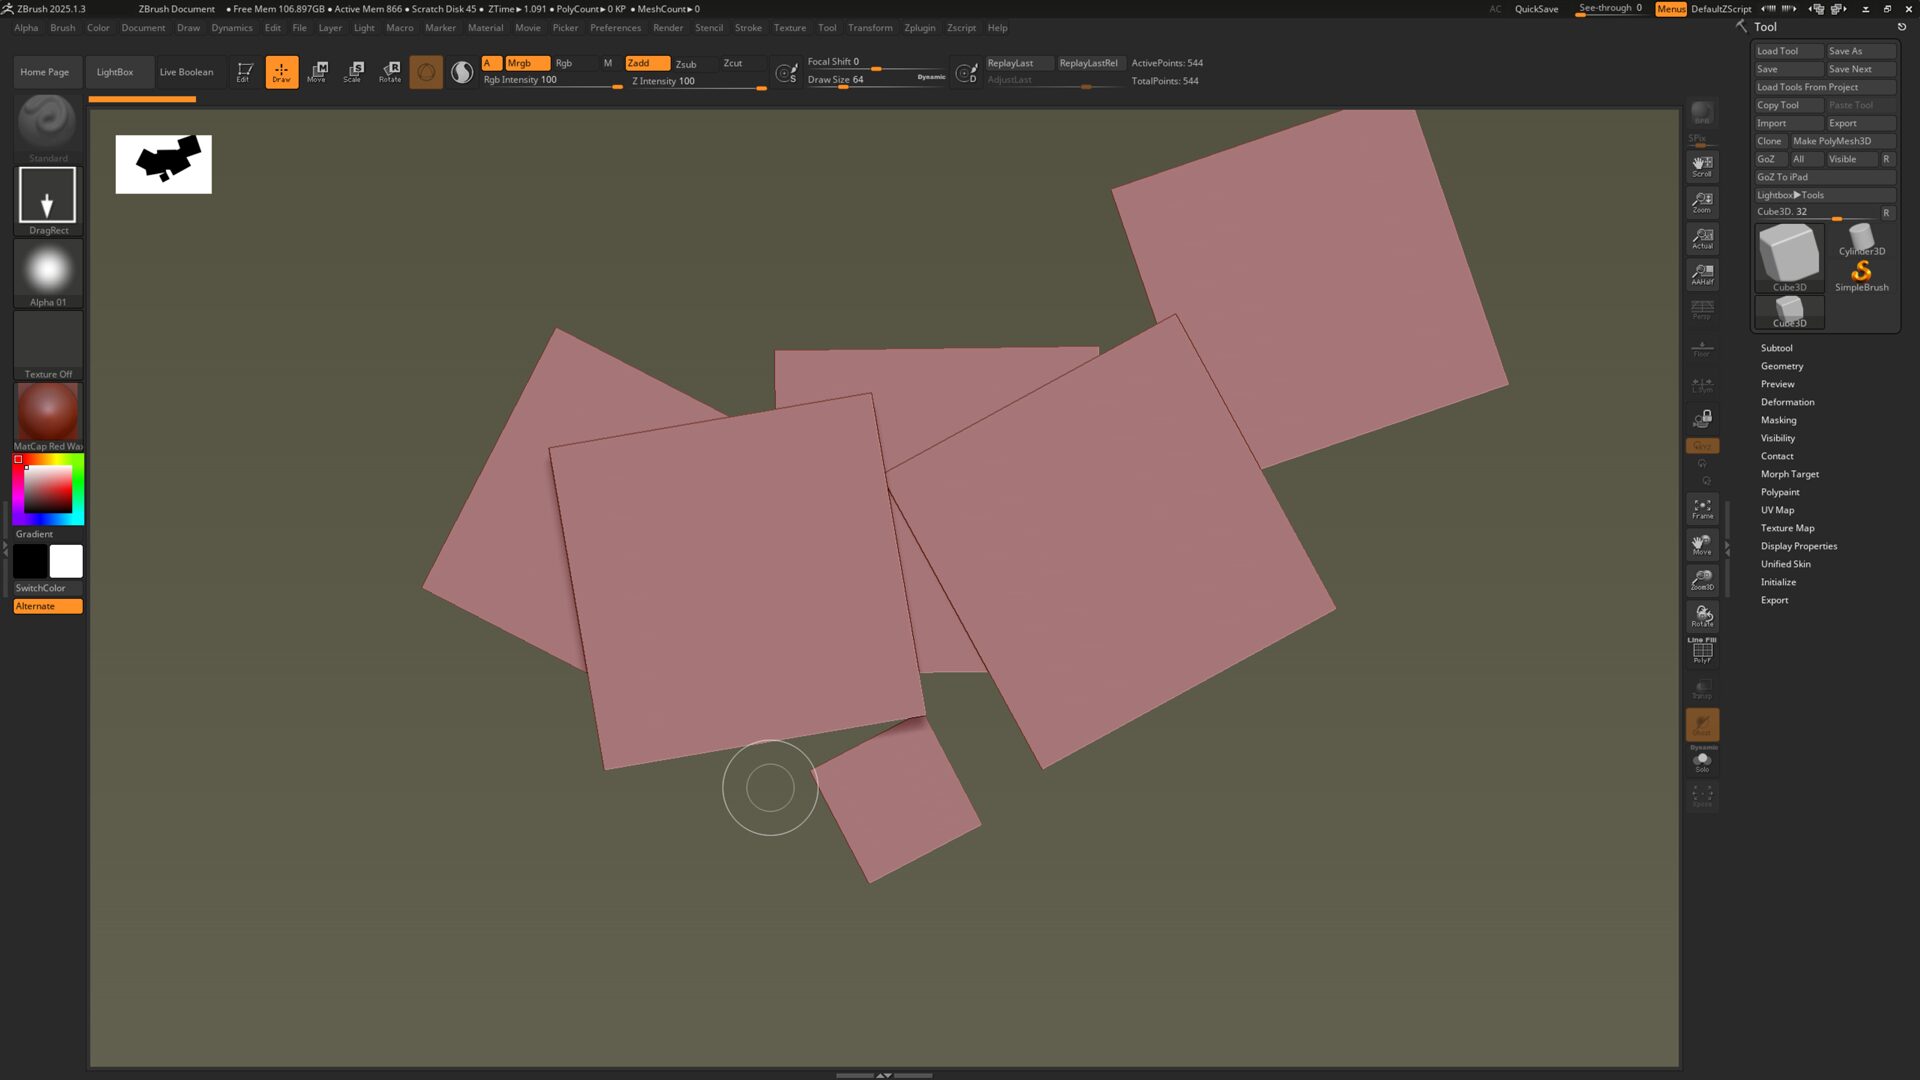
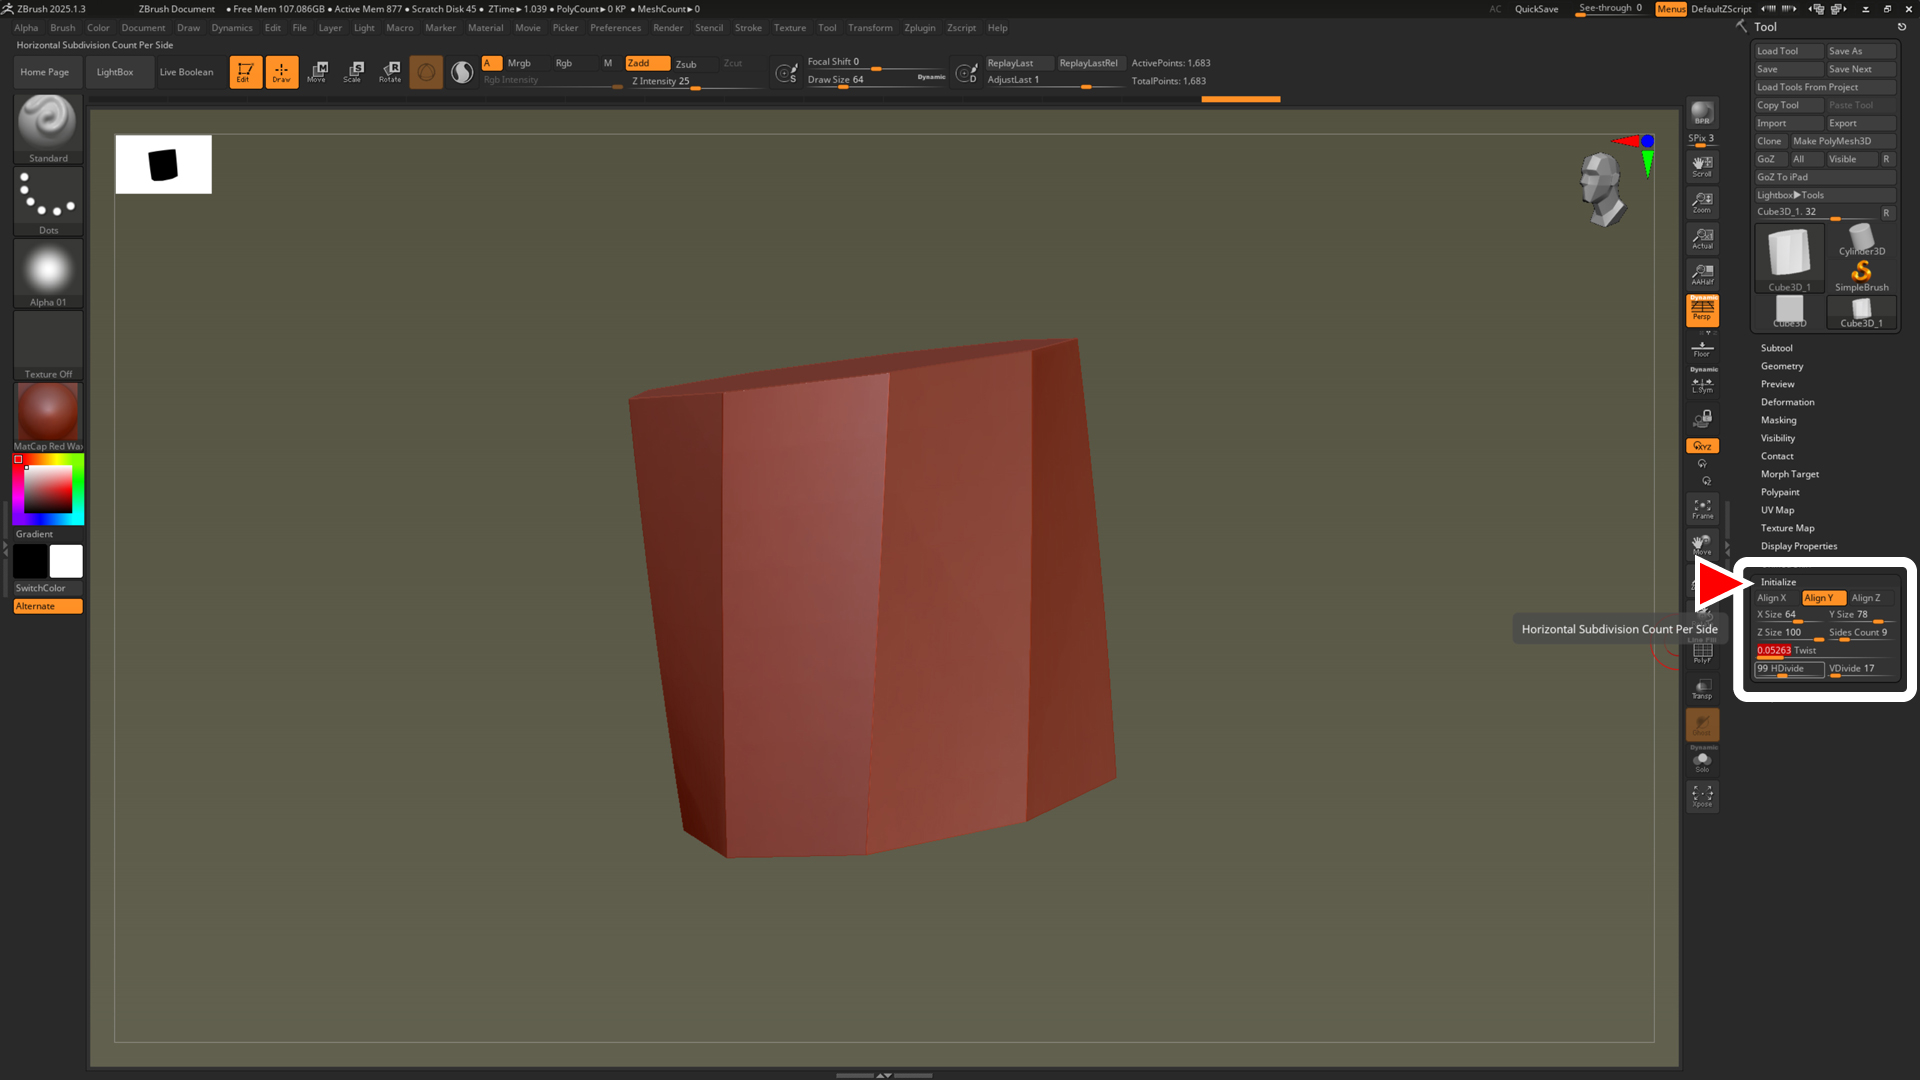
- [ Initialize ] から分割数を変更したりなど、ポリゴンの構造を変更することができます。
![]()
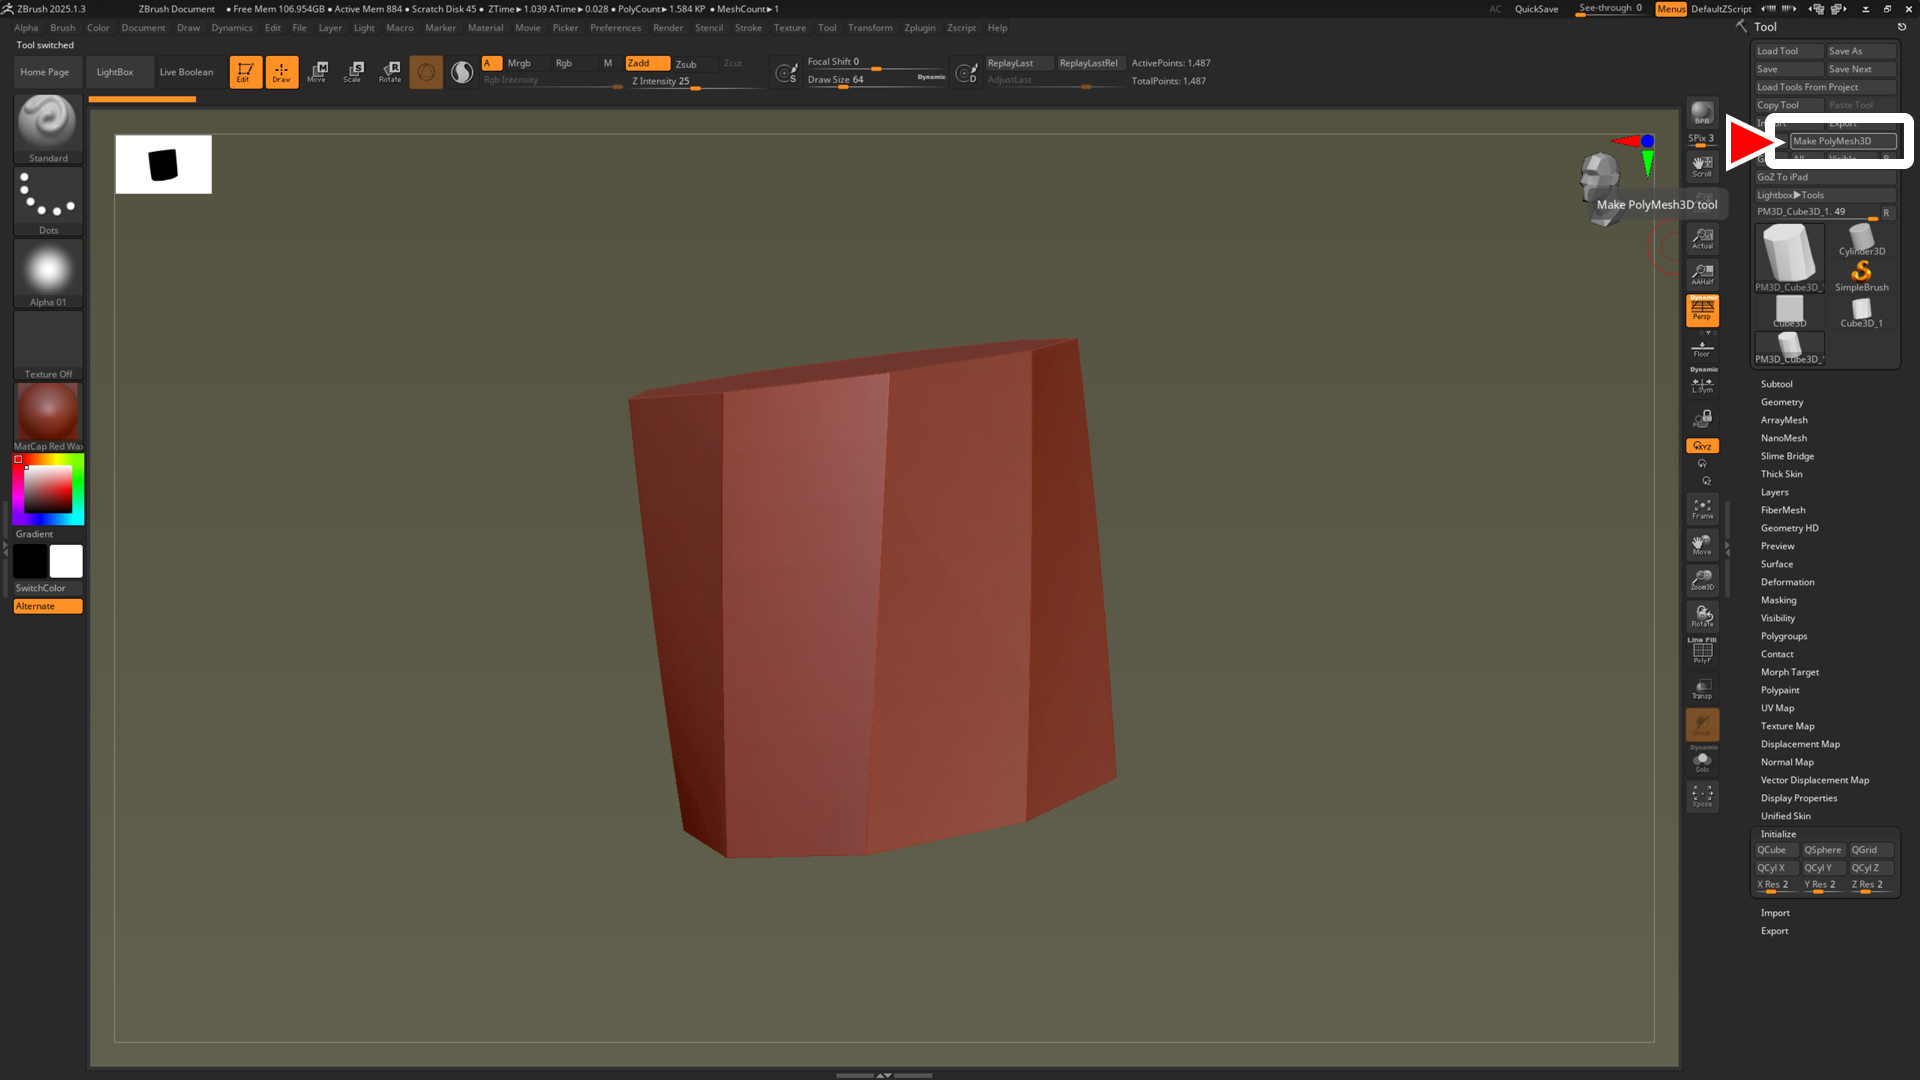
- [ Tool ] パレット の [ Make PolyMesh3D ] ボタンをクリックして、PolyMesh3D に変換します。
[ Subtool ] に ” PM3D ” から始まる名前で PolyMesh3D が作成されます。![]()
obj や fbx などの 3D アプリケーションで作成したデータをインポートする方法
最後に、obj や fbx などの 3D アプリケーションで作成したデータをインポートする方法を確認します。
- [ Tool ] パレット の [ Import ] ボタンをクリックして、obj や fbx など読み込みます。
- キャンバスに描画します。
- [ Edit ] ボタンを ON にして、3D エディットモード に切り替えます。
![[ Zbrush ] ドキュメントサイズの設定方法](https://www.plamophy.com/wp-content/uploads/ZBrush_document-size_10-300x169.jpg)
![[ Zbrush ] 起動時に LihgtBox を非表示にする設定方法](https://www.plamophy.com/wp-content/uploads/ZBrush_lightbbox_01-300x169.jpg)
![[ Substance 3D Painter ] ペイントブラシの設定方法](https://www.plamophy.com/wp-content/uploads/substance3dpainter-ec-painting-brush-setting-01.jpg)
![[ Substance 3D Painter ] レンダリングの設定項目](https://www.plamophy.com/wp-content/uploads/substance3dpainter-ec-rendering-01.jpg)
![[ Unreal Engine 5.3.1 ] Procedural Content Generation (PCG) の使用方法について](https://www.plamophy.com/wp-content/uploads/unrealengine-ec-pcg-01.png)
![[ Substance 3D Painter ] サフィックスを利用したベイク方法](https://www.plamophy.com/wp-content/uploads/substance3dpainter-ec-baking-mode-suffix-01-150x150.jpg)
![[ Unreal Engine 5.3.1 ] Procedural Content Generation (PCG) の使用方法について](https://www.plamophy.com/wp-content/uploads/unrealengine-ec-pcg-01-150x150.png)
![[ Substance 3D Painter ] 塗りつぶしレイヤーの作成方法](https://www.plamophy.com/wp-content/uploads/substance3dpainter-ec-painting-filllayer-02-150x150.jpg)
![[ Substance 3D Painter ] インポートしたマテリアルの設定方法](https://www.plamophy.com/wp-content/uploads/substance3dpainter-ec-painting-decal-import-01-150x150.jpg)
![[ Substance 3D Painter ] マテリアル、テクスチャのインポート方法](https://www.plamophy.com/wp-content/uploads/substance3dpainter-ec-resource-import-01-300x125.jpg)
![[ Substance 3D Painter ] ベイクの手順と共通設定](https://www.plamophy.com/wp-content/uploads/substance3dpainter-ec-baking-mode-01-300x125.png)
![[ Substance 3D Painter ] テクスチャエクスポートの設定方法](https://www.plamophy.com/wp-content/uploads/substance3dpainter-ec-export-textures-01-300x125.jpg)
![[ Substance 3D Painter ] 半透明マテリアルのシェーダー設定方法](https://www.plamophy.com/wp-content/uploads/substance3dpainter-ec-shader-settings-alpha-blending-01-300x125.png)
![[ Substance 3D Painter ] ペイントブラシの設定方法](https://www.plamophy.com/wp-content/uploads/substance3dpainter-ec-painting-brush-setting-01-300x125.jpg)
![[ Substance 3D Painter ] シンメトリーを使用したペイント方法](https://www.plamophy.com/wp-content/uploads/substance3dpainter-ec-painting-brush-symmetry-01-300x125.jpg)
![[ Substance 3D Painter ] ポリゴン塗りつぶしツールを使用したマスキング方法](https://www.plamophy.com/wp-content/uploads/substance3dpainter-ec-masking-polygon-fill-01-300x125.jpg)
![[ Substance 3D Painter ] 色相の変更とグラデーションの作成方法](https://www.plamophy.com/wp-content/uploads/substance3dpainter-ec-painting-color-variations-01-300x125.jpg)
![[ Substance 3D Painter ] レンダリングの設定項目](https://www.plamophy.com/wp-content/uploads/substance3dpainter-ec-rendering-01-300x125.jpg)
![[ Substance 3D Painter ] 環境マップの設定と明るさの調整方法](https://www.plamophy.com/wp-content/uploads/substance3dpainter-ec-display-settings-01-300x125.jpg)
![[ Zbrush ] データの保存とロード方法について](https://www.plamophy.com/wp-content/uploads/ZBrush_data_storage_format_01-300x169.jpg)
![[ Zbrush ] UIをカスタムする方法について](https://www.plamophy.com/wp-content/uploads/ZBrush_ui-customization_01-300x169.jpg)
![[ Zbrush ] スカルプトするまでの手順](https://www.plamophy.com/wp-content/uploads/ZBrush_3d-edit-mode_03-300x169.jpg)