![[ Substance 3D Painter ] How to mask using ID Map](https://www.plamophy.com/wp-content/uploads/substance3dpainter-ec-masking-id-map-01.png)
One way to create masks in Substance 3D Painter is to use ID Map.
By baking an ID Map as in the article on this page, you can easily create a mask by simply selecting the area you want to mask from the viewport.
In this article, I would like to review the masking method using ID Map.
How to mask using ID Map
About grouping layers
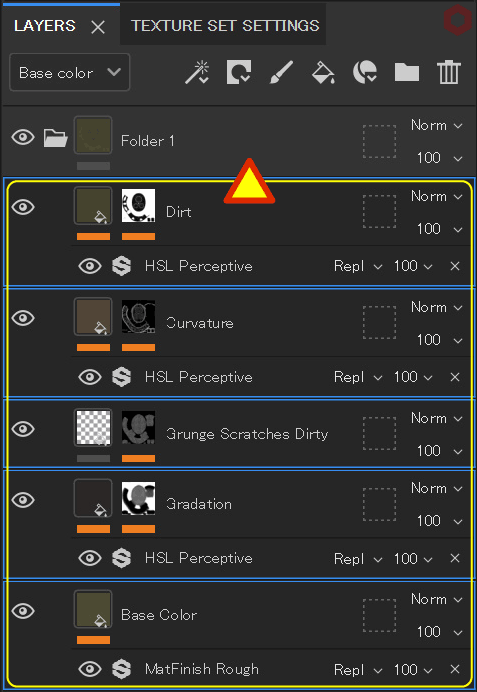
Group the layers before creating the mask.
This allows you to mask entire groups.
- With all the layers you want to group selected, press Ctrl + [ G ] to create a group layer.
![]()
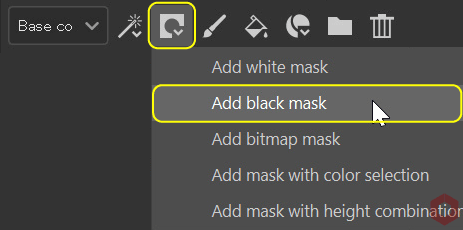
- Click the [ Add mask ] icon and select [ Add black mask ].
![]()
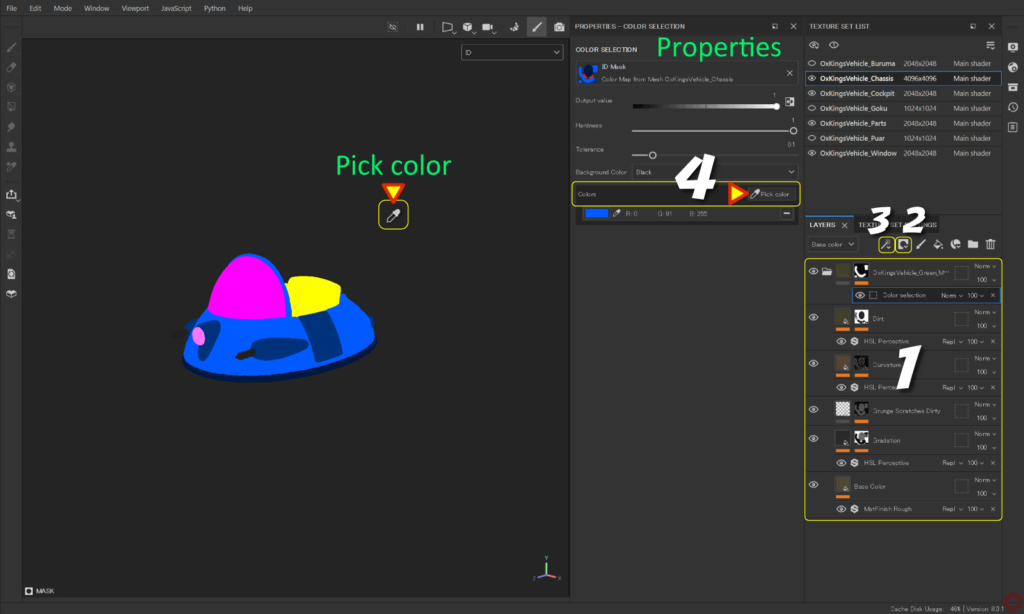
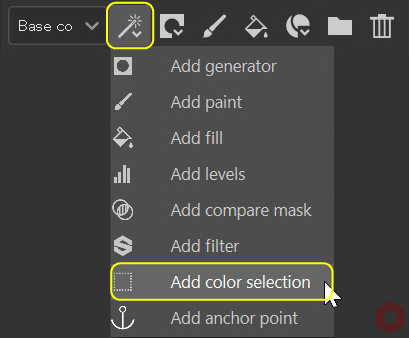
- Click the [ Add effect ] icon and select [ Add color selection ].
![]()
- When you click the [ Pick color ] button, an eyedropper icon will appear.
Select the color you want to mask from the viewport.
Summary
We have confirmed the masking method using ID Map.
On the next page, we'll see how to mask using the polygon fill tool!
Next page Let’s go!
![[ Substance 3D Painter ] How to change the hue and create a gradient](https://www.plamophy.com/wp-content/uploads/substance3dpainter-ec-painting-color-variations-01-300x125.jpg)
![[ Substance 3D Painter ] How to mask using the Polygon Fill tool](https://www.plamophy.com/wp-content/uploads/substance3dpainter-ec-masking-polygon-fill-01-300x125.jpg)
![[ Substance 3D Painter ] Bake procedure and common settings](https://www.plamophy.com/wp-content/uploads/substance3dpainter-ec-baking-mode-01-150x150.png)
![[ Substance 3D Painter ] Setting items related to New creation and Normal](https://www.plamophy.com/wp-content/uploads/substance3dpainter-ec-newproject-creation-01-150x150.jpg)
![[ Substance 3D Painter ] How to set up texture export](https://www.plamophy.com/wp-content/uploads/substance3dpainter-ec-export-textures-01-150x150.jpg)
![[Substance 3D Painter] Rendering setting items](https://www.plamophy.com/wp-content/uploads/substance3dpainter-ec-rendering-01-150x150.jpg)
![[ Substance 3D Painter ] マテリアル、テクスチャのインポート方法](https://www.plamophy.com/wp-content/uploads/substance3dpainter-ec-resource-import-01-300x125.jpg)
![[ Substance 3D Painter ] ベイクの手順と共通設定](https://www.plamophy.com/wp-content/uploads/substance3dpainter-ec-baking-mode-01-300x125.png)
![[ Substance 3D Painter ] テクスチャエクスポートの設定方法](https://www.plamophy.com/wp-content/uploads/substance3dpainter-ec-export-textures-01-300x125.jpg)
![[ Substance 3D Painter ] 半透明マテリアルのシェーダー設定方法](https://www.plamophy.com/wp-content/uploads/substance3dpainter-ec-shader-settings-alpha-blending-01-300x125.png)
![[ Substance 3D Painter ] ペイントブラシの設定方法](https://www.plamophy.com/wp-content/uploads/substance3dpainter-ec-painting-brush-setting-01-300x125.jpg)
![[ Substance 3D Painter ] シンメトリーを使用したペイント方法](https://www.plamophy.com/wp-content/uploads/substance3dpainter-ec-painting-brush-symmetry-01-300x125.jpg)
![[ Substance 3D Painter ] 環境マップの設定と明るさの調整方法](https://www.plamophy.com/wp-content/uploads/substance3dpainter-ec-display-settings-01-300x125.jpg)
![[ Substance 3D Painter ] レンダリングの設定項目](https://www.plamophy.com/wp-content/uploads/substance3dpainter-ec-rendering-01-300x125.jpg)

![[ Introduction to Substance 3D Designer ] Basic steps to output to Substance 3D Painter](https://www.plamophy.com/wp-content/uploads/substance3ddesigner-ec-camouflage-01-300x125.jpg)
![[ Unreal Engine 5.3.1 ] How to use Procedural Content Generation (PCG)](https://www.plamophy.com/wp-content/uploads/unrealengine-ec-pcg-01-300x125.png)
![[ Substance 3D Painter ] How to use the stencil](https://www.plamophy.com/wp-content/uploads/substance3dpainter-ec-painting-brush-stencil-01-300x125.jpg)